Managing backups in a multi-account cloud environment can be challenging, but AWS Backup simplifies the process. This managed service allows you to handle backups across accounts, whether centralized or decentralized. It’s easy to set up, offers various options, and is tailored to meet the needs of regulated environments. If you need to demonstrate compliance or ensure your backups can be restored, AWS Backup provides features for compliance checks and automated restoration.
In this article series, I’ll explore AWS Backup in detail and guide you through designing a scalable backup architecture for multi-account environments. Let’s dive in!.
Table of contents
Open Table of contents
Basic concepts
- Backup plans: Backup plans define when, what, and how backups are performed in AWS Backup. These rules and policies can be deployed using infrastructure as code. You can create multiple plans, such as daily or weekly backups, and associate resources to be backed up. Your strategy depends on the resources, compliance requirements, and layers of backup you need.
- Incremental backups: For cost optimization, the first backup creates a full copy of your data, while subsequent backups are incremental, only saving changes since the previous point. Backup retention should ideally be set to at least one week to avoid unnecessary costs from repeated full backups due to missing previous points.
- Recovery points: Every backup performed by AWS Backup is called recovery point.
- Backup vault: Vaults securely store backups and are immutable, meaning stored recovery points cannot be modified but can be deleted by account owners. To add extra protection, you can configure object lock for compliance and governance. Backups are encrypted at rest using KMS keys, where the vault encryption key differs from the original data encryption key.
- Backup jobs: A backup job is the operational unit triggered by a backup plan. It creates backups of configured resources, stores them in the designated vault, and generates a new recovery point.
Supported services
One key advantage of AWS Backup is its centralized management, eliminating the need to configure backups individually for each service. However, not all AWS resources are supported, and feature availability may vary by service and region. In this article series, I’ll focus on the most common services and universally available features, sufficient for establishing Backup as a Service on your platform.
The services covered include: S3, DynamoDB, EC2, EFS, EBS, RDS, and Aurora.
Creating a backup vault
The first step in this deep dive is setting up a backup vault, which stores all recovery points generated by backup plans. I’ll start by demonstrating the full setup via the AWS Management Console, helping to clarify key concepts required when transitioning these operations to infrastructure as code.
Creating a vault is straightforward. For simplicity, this example uses the default AWS-managed KMS key. In production environments, however, it’s highly recommended to use a custom provisioned KMS key for enhanced security. In our case, we simply need to provide a name for the vault.

Once the vault is created, we can start to backup our data. One piece of configuration that we are waiting to configure is the lock options, because it requires a bit more explanation. Let’s see the both options:
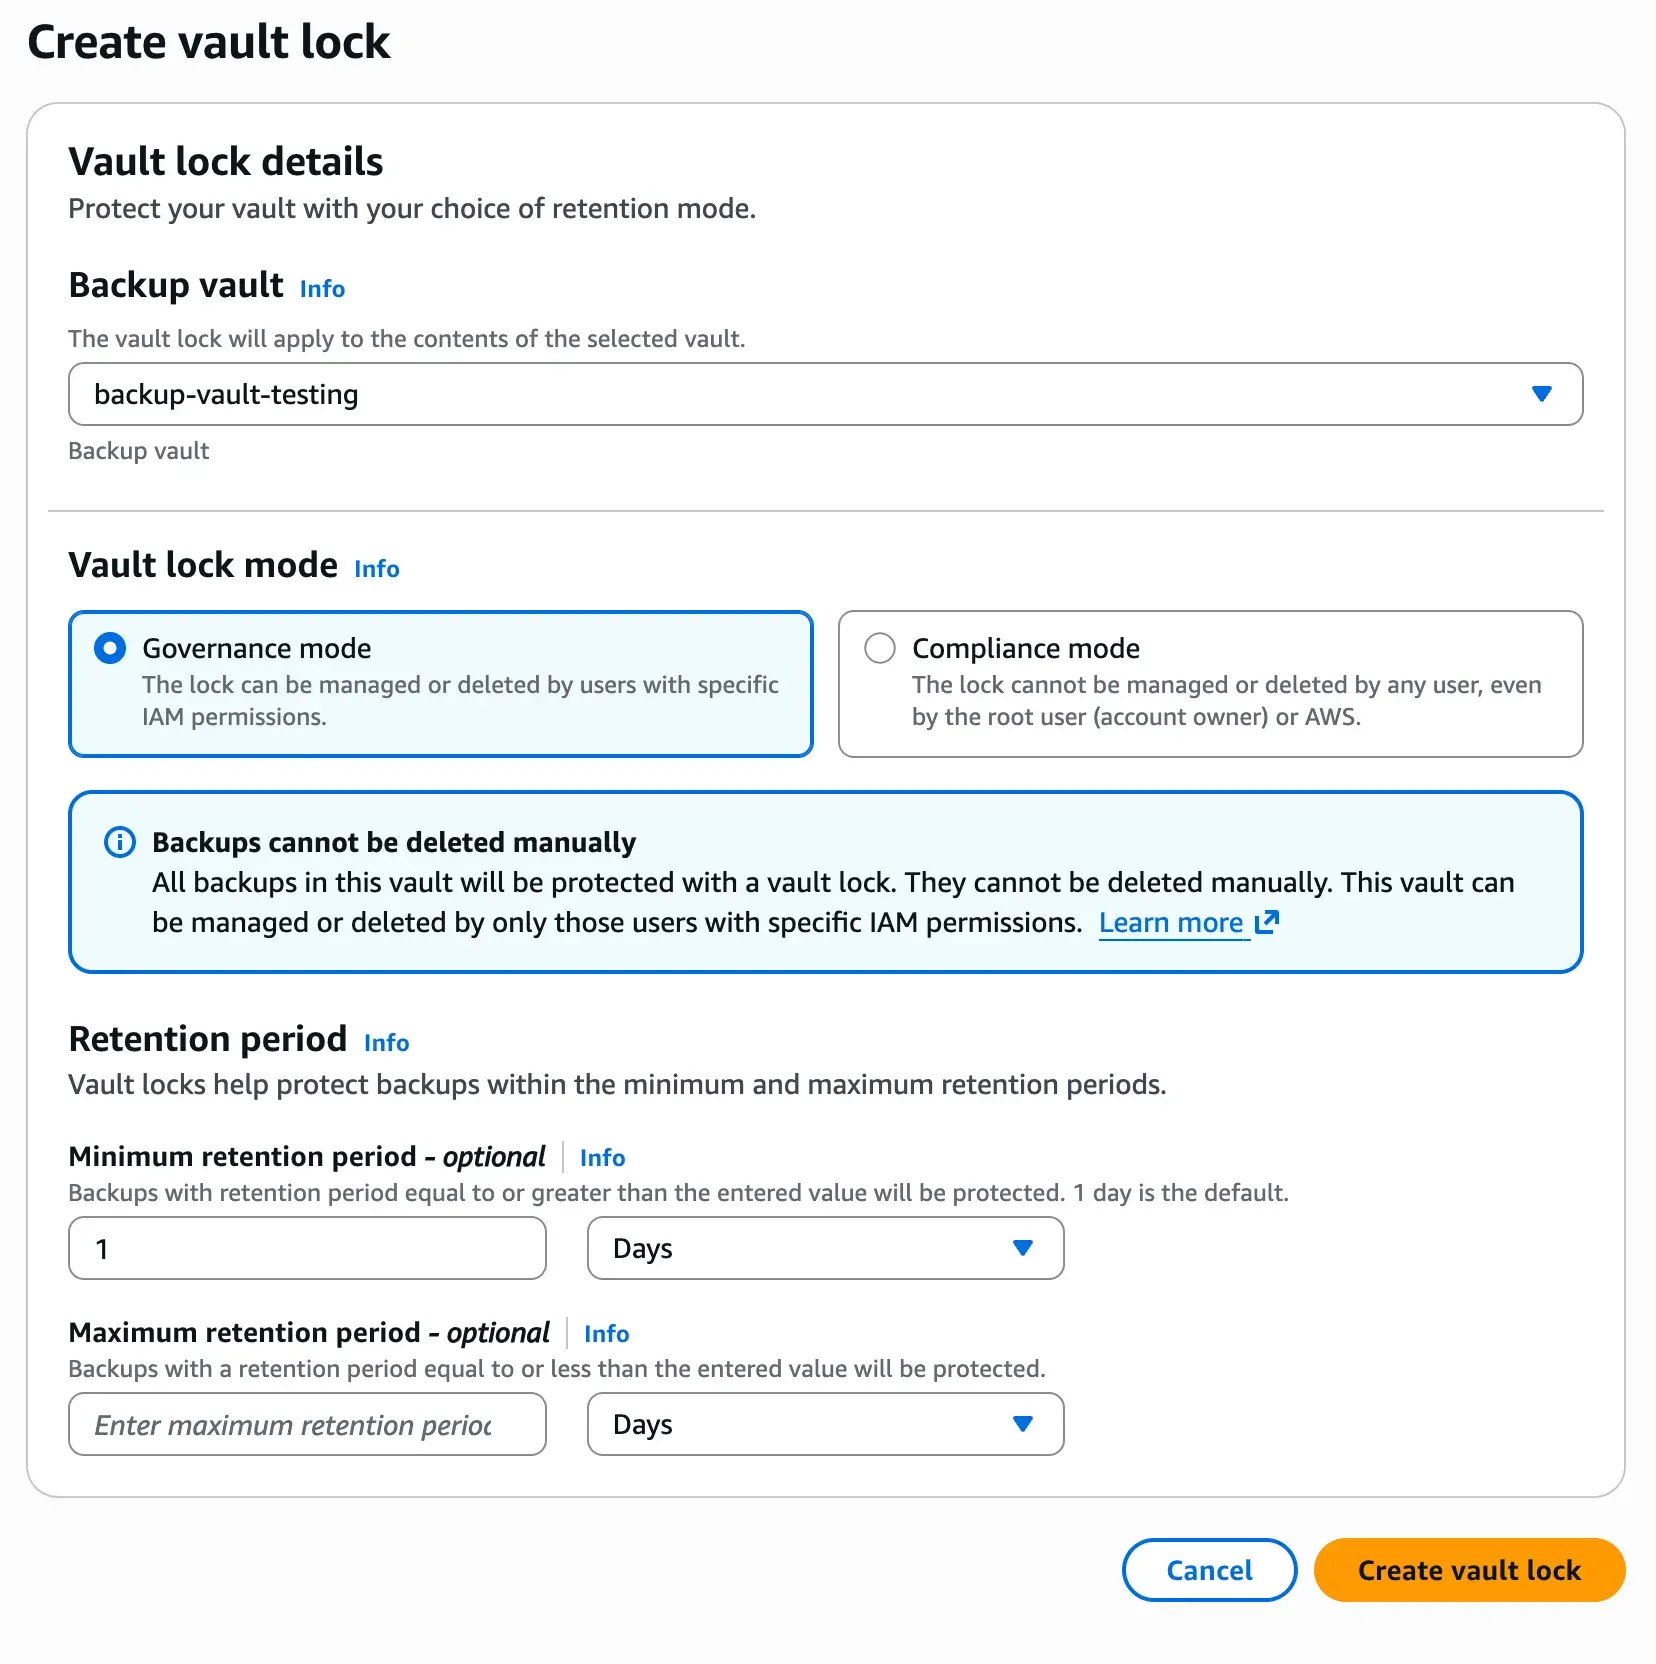
Lock options: Governance mode vs Compliance mode.
As mentioned above, the backups taken by the services are immutable in the sense that the data of the recovery points can not be altered. But we can still with the right IAM permissions delete the recovery points. AWS offers us another layer of protection on our AWS Backups with two modes that prevent the management or deletion of the recovery points.
- Governance mode: This lock is applicable during the retention period that we indicate and prevents the management of the deletion of the vault unless we have specific IAM permissions.
- Compliance mode: Compliance mode is most secure mode. The vault is locked for any user, root user or even AWS during the retention period. This mode is the most secure layer, but it has hard implications, that no one can manage the vault. In case we make some configuration mistakes, AWS offers us the possibility to remove the lock. See the following screenshot:
Once the vault lock is created, our vault will have the retention periods we configured. It’s important to mentioned that if we enforced the lock, any recovery point or job with different retention period that we indicate here will fail.
Creating backup plans
Once we have the vault, it’s time to create our first backup plan. First step to create a backup plan is to give it a name. Let’s imagine the use cases that we want to create a daily backup and this daily backup we are going to configure to have a 30 days of retention period. Because we can have more than one plan, I will call this one: backup_daily_30_days_retention
Once we indicate the backup plan name, we can go to set up the rule configuration:

We need to select the vault where the backup should store the recovery points and the frequency we want. In coming articles I will explain about the logically air-gapped vault. The plans are regional, meaning that the vault that we created should be created on the same region of the recovery points that you are creating with the plan. I will explain later how you can synchronize your vaults from different regions.
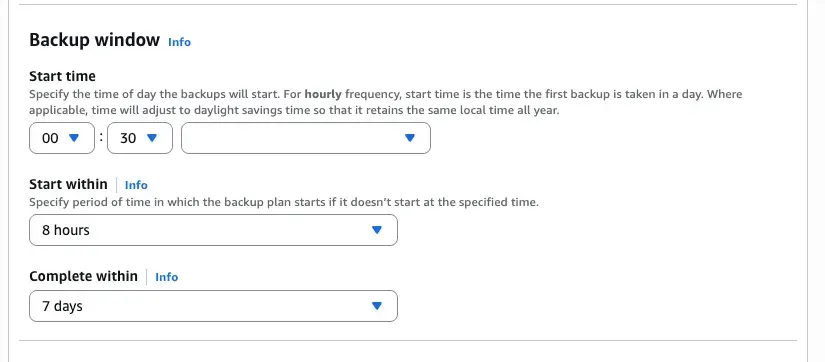
Now we can manage when the backup should start. AWS can not warranty that starts at the exact time, so we can configure also within a timeframe here the backup can start and we can indicate on how long the backup should be completed. Depending on the amount of resources that we expect to backup and the frequency of the backups is good taking these window options in considerations.
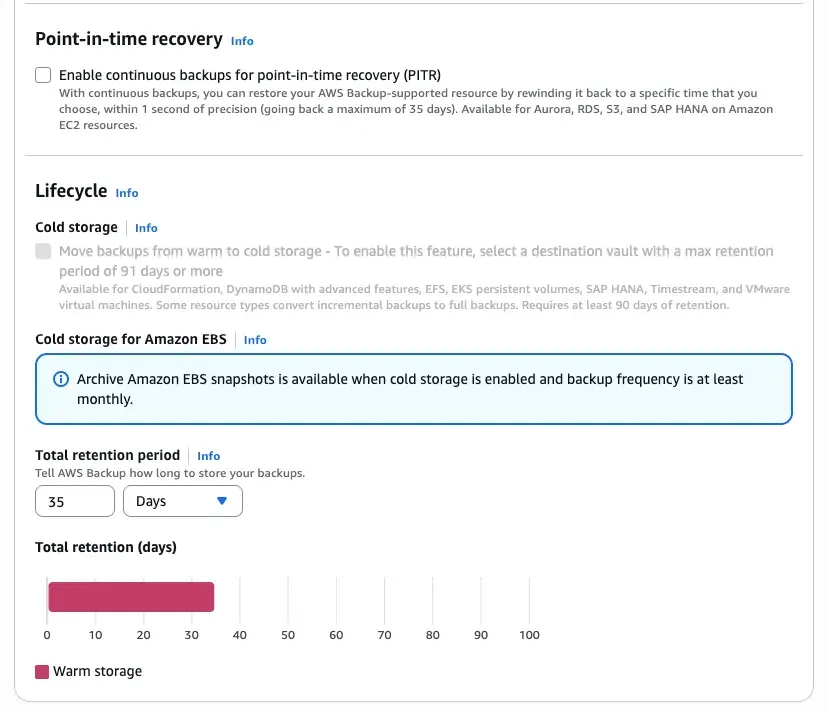
Finally two options that are only available for certain resources. For one hand we have point-in-time recovery. Using this option you are using a time machine where you go back to the moment you like of your recovery points with 1 second precision. If you choose this option your maximum retention period is the 35 days, so keep in mind that needs to be compatible with the retention periods of your vault. This feature is only supported for some services. For the sake of the example we are not going to use. The second feature is the cold storage. This is an option that help us with the cost management, because after 90 days the recovery points are move to a cold storage. In case of EBS backups you have the possibility to enrich the backup configurations with some options. Take in account that to use this options you need to setup your retention period of your vault as minimum 90 days and also in some resources every recovery point will contain a full backup. The total retention period of the recovery points in this case should also be as minimum of 90 days and maximum the max retention period of the vault. Other interesting features are:
- Backup indexes: only available for S3 and EBS. Every recovery point is indexed so it can search later.
- Scan recovery points with GuardDuty for malware: only for S3, EC2 and EBS.
- Advance settings like backup your ACLs and object tags when you are backing up S3 resources.
Assigning resources
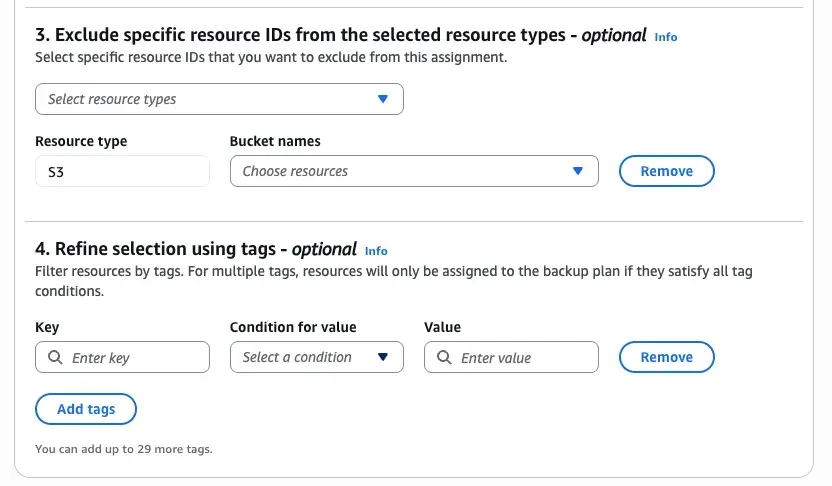
When we create the plan we have the option to assign resources. To our daily backup we are going to start backing up S3 buckets. So, after creating the plan on the console we will see the following screen:
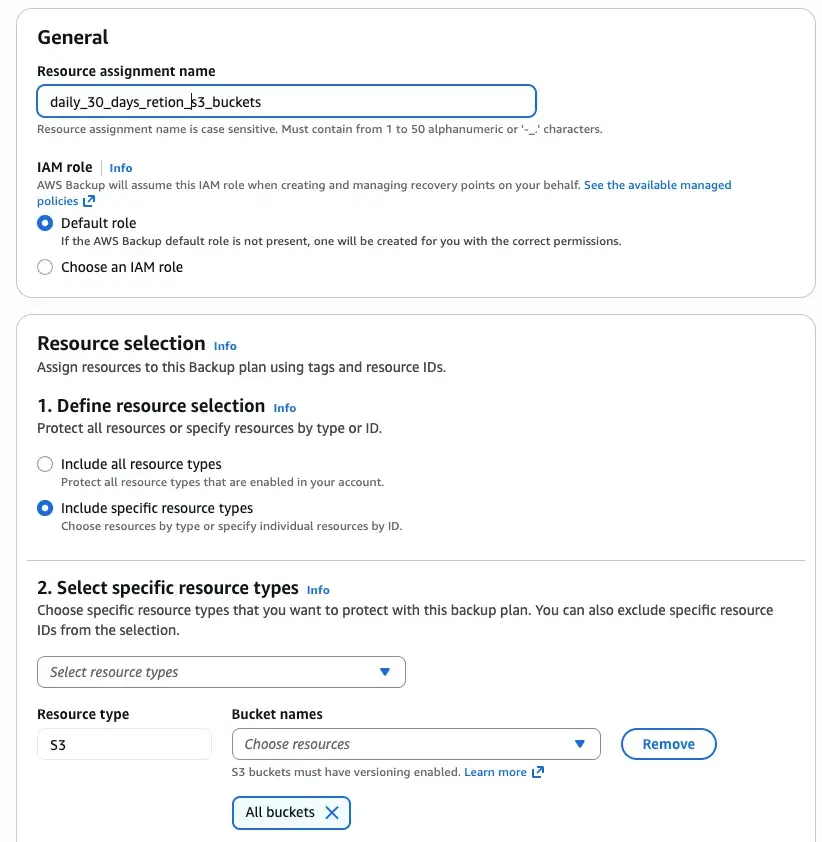
One resource assignment will contain one entry, so is it’s own entity. After the name we can select the role with the required permission we need, otherwise we can use one created by the service itself. And we can start with the resource selection. We can just select all the resources supported available on the account or we can select specific ones. In this case we select all the buckets on the account. Now is when things gets interesting. In many cases, we do not want to backup all S3 because they are not work to backup, for instance, temporary data, deployment assets that are sort live or other data for maintaining the account. So, in the next option we can select tags and conditions for its values that if that only when the condition met the S3 bucket is bucket. In AWS, the use of the tags is really important, so when you building your applications remember to add a tagging strategy to it. If you do not tag your resources from start, think about how to autotag them later. The good thing of tagging is that do not create infrastructure drifts, so you can use AWS Config or one custom autotagging solution even with resources that have been provisioned on stacks with cloudformation.
Create the resource assignments per supported services it gives the opportunity to the platform to make sure for instance to backup the supported services at this moment by the platform or not add resources that your platform never going to utilize.
Backup jobs and backups reports.
When our backup plans are execute, the service will generate a job per backup plan configuration we defined. If we follow the example that we created above, a backup job will be created for our S3 resources. We can see the executions on the AWS Backups → Job and after the Job is finished we can check the status of all the jobs on the AWS Backups → Dashboard → Jobs Dashboard. If we want to automate the monitoring of the backup jobs, for instance to be alerted when a backup job failed, then we can rely on Amazon EventBridge for that.